Author: Moses Miller

Why Residential Painting Is Worth the Time and Effort

Residential painting involves much more than just a fresh coat of paint. A quality job requires careful planning and execution, resulting in the best-looking outcomes at an optimal price.

The best way to do that is to work with experienced house painters with the skills, tools, and knowledge to produce flawless results. Click here to Learn More.

painting

Often overlooked, the ceilings of our rooms can communicate a lot about our design style and mood. Adding a fresh coat of paint to a room’s ceiling is an easy way to refresh the entire space without a major renovation project. But painting the ceiling can also be a bit of a pain in the neck—literally.

To make the job easier, Vaamonde recommends removing any light fixtures that are too cumbersome to move, and covering anything that can’t be moved with drop cloths. She also recommends taking the opportunity to clean the room’s ceiling, and if you can, removing any smoke detectors or other items that hang from the ceiling. Finally, you’ll want to mask the edges of the walls and crown molding with quick-release painter’s tape.

When it comes to the actual painting, work in sections of about 5 or 6 ft. square, to avoid dripping paint or leaving lap marks. Start your first section by overlapping onto the wet edge of the last one to help keep you from accidentally painting over something you don’t intend to.

A high-quality, latex ceiling primer will help provide a smooth surface for your paint, and cover any stains or discolorations. It’s a good idea to apply the primer using a brush, rather than a roller, to ensure a neat, even application.

Finally, for the main event, you’ll need a high-quality, waterborne ceiling paint that dries quickly and hides imperfections well. A “dead flat” paint works best for this purpose, and Benjamin Moore offers thousands of shades to choose from, so you’re sure to find the perfect color for your ceiling.

Whether you’re updating your entire home or just one room, professional interior painting can add value to your property and make your living spaces look newer and more appealing. So if you’re ready to breathe some life into your home, contact a local pro for free, no-commitment quotes. They’ll be happy to give you expert advice on the best colors for your space and how to tackle those hard-to-reach spots. They’ll also help you choose the right equipment to get the job done.

Bathrooms are often the first areas of the house to show signs of wear. They can also be one of the most challenging rooms to paint. Because of the high humidity levels in bathrooms, painted surfaces can quickly become mildewy or moldy. It is important that the right paint is used in this room to prevent these problems. Choosing a moisture resistant paint with an anti-fungal agent will help.

As with all painting projects, preparation is key for success. Before beginning, it is best to remove any light fixtures or hardware from the walls. This includes the removal of the mirror and any hardware that is attached to the vanity cabinet. Next, cover any items that you do not want to be painted with plastic sheeting and spread a drop cloth on the floor in case of any accidental drips.

Once the prep is done, you can begin painting. Be sure to use a sash brush to get into the corners of the room. The bristles on a sash brush are tapered and can reach into small spaces that other brushes cannot. It is a good idea to choose a white or beige paint for the bathroom, as it will reflect the sunlight and make the room look larger. Lastly, consider adding an oversized mirror to the wall to magnify the existing natural light and make the room appear more spacious.

Residential painting is a large job and should be undertaken by professionals who have the tools, skills, and knowledge to perform the task in a safe and efficient manner. The best way to find a residential painter is to do your research and take the time to compare quotes from different companies. It is important to find a company that has experience and is reliable and honest. Do not be swayed by a low price alone, as the quality of the finished product will be more than worth the extra investment. Choosing the right company can transform your home and boost its curb appeal for years to come. Whether you are looking to have your home’s interior or exterior painted, there is a residential painting company that can help you achieve the look you have always wanted.

There are many daunting tasks a homeowner may attempt to do around the house, from landscaping and retiling a tub, but few DIY jobs make as much of an impact in such little time as repainting. A fresh coat of paint can transform a bedroom from a boring space into a cozy retreat. If your bedroom is in need of a facelift, it’s worth the time and effort to make it happen.

Bedrooms are low-impact areas where homeowners often use more neutral, muted color options that help promote a restful sleep environment. Vibrant yellows and reds are best reserved for living rooms, but they’re not conducive to a calm space where you prepare for bedtime. Instead, look for paints with soft greens and blues to create a relaxing escape.

Choosing the right paint sheen is important, as well. While shiny sheens like gloss or semigloss aren’t recommended for bedrooms, satin and eggshell paints offer a more durable option that can easily be wiped clean of any marks or smudges.

The key to a successful painting project is having all of the necessary tools. A high-quality brush is important to help you get into tight corners and crevices. A roller can also be a valuable tool for large surfaces, as it allows you to cover a large area in a short amount of time. Tape is another must-have for residential painting, as it helps you achieve a flawless finish on all edges and surfaces.

When it comes to a clean, crisp white wall color for bedrooms, no other choice is better than All White by Farrow and Ball. It’s a clean and classic white that can be accented with any interior decor color to suit your personal style.

The most popular wall colors for bedrooms are whites and grays, such as the classic Linen White OC-17 by Benjamin Moore. This popular white has warm undertones that are calming and inviting, making it an ideal choice for the master bedroom. For a bolder alternative, try a peach or blush tone, like the blush pink in this client’s bedroom, to add warmth and whimsy.

Homeowners tend to have a specific vision for the visual appeal of their spaces. Residential painters can work with homeowners to meet those goals, including by recommending colors and treating surfaces properly. They also have experience working with the complexities of different types of surfaces, and can help homeowners avoid painting mistakes like mismatched wall colors or paint drips.

Kitchens are especially hard-wearing areas, so it’s important to choose a durable paint. This ensures that the new finish stands up to repeated scrubbing and washing and will continue to look good for years to come. A high-quality kitchen paint will typically be formulated to be easy to wipe down and should be used on both walls and ceilings.

It’s a good idea to start at the top and work down so that any drips can be wiped away before they’re a problem. You can opt for a sprayed-on finish, which will give your kitchen an extra smooth and even surface. However, this is a time-consuming process and requires special equipment that can be costly to rent. It’s also essential to mask off any areas that shouldn’t get painted, such as the edges of the room or countertops.

A simple coat of paint can instantly brighten up a kitchen, making it feel bigger and lighter. Designer Meg Kelly chose a warm grey (Sherwin-Williams’ Tinsmith, SW 7657) for the cabinets in this East Nashville home, and a crisp white on the walls to keep things feeling light and airy.

Choosing a similar color for the ceiling can further open up the space and make it feel larger, as it does here in this modern farmhouse kitchen. Sherwin-Williams’ Classic White (SW 7003) keeps the palette feeling balanced and calm.

While neutrals are great for kitchens, you can use bolder shades to add interest and drama. Here, a mustard yellow wall in this kitchen makes the two substantial wall cabinets recede and accentuates the white window frame and ceramic sink.

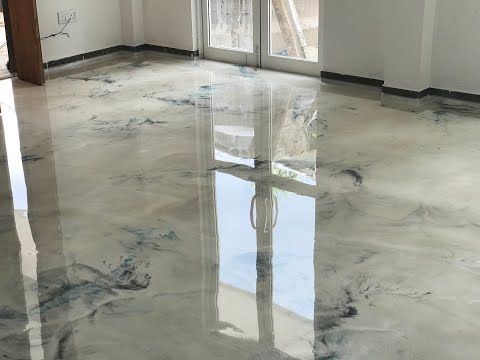
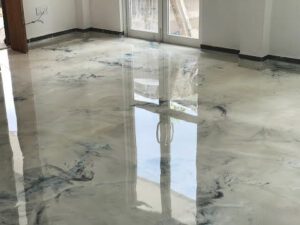
Whether it’s in a business, an office building, or an apartment complex, commercial spaces require a lot of foot traffic. This can make it tricky to get a project done, as the property may have to remain open for customers or employees throughout the job.

The Importance of Proper Preparation and Inspection When Hiring an Exterior Painter

Painting the exterior of a home requires time and care. Choosing a quality paint that will hold up well to outdoor weather conditions, including strength and daily duration of sunlight, amount of rainfall, and temperature variance, is important.

Exterior Painter

Additionally, painters should use paints formulated for specific surface materials and mildew resistance. Using these best practices will ensure that a home’s new paint job looks great for years to come. For professional help, contact Painters Toms River.

Whether painting the exterior of a building for the first time or repainting a house, preparation is the most important part of the process. Regardless of the product used, a poorly prepared surface will never produce a good paint job. The best commercial painters know how important proper preparation is and use the appropriate steps to prepare a surface for painting.

The first step of preparation is washing the entire exterior of a building or house. This is done to remove any dirt and debris that may interfere with the adhesion of new paint. It is also a good opportunity to remove any loose or flaking paint and scrape bare wood areas. Then, the surface is sanded either by hand or with a power sander. Light sanding will remove any rough areas on the surface and give the final smooth surface needed for painting.

As the surface is sanded and cleaned, any damaged areas will be identified and repaired. This can be due to wear and tear, weather conditions or insect activity. This is a good time to repair these items, and it is a good idea to have an experienced handyman on hand. If necessary, the handyman can make repairs and then apply caulking or insulation to those areas.

It is also a good idea to cover any plants or shrubs with lightweight canvas tarps. This will keep the dirt and debris from falling into them, and can be removed at the end of each day. It is also a good idea to cover outlets and fixtures with painter’s tape.

Lastly, a light misting with a hose will clean the surfaces and help them to dry before the actual painting begins. This will also remove any moisture that is trapped in the pores of the surface.

Depending on the intensity of the color, one or two coats of exterior paint may be applied. A good quality latex or acrylic paint is recommended, and a sprayer should be used to get the best results. It is also a good idea to use a waterproofing additive when applying the paint.

Color Selection

The right color scheme can make your home stand out, create an individual statement, and boost curb appeal and resale value. It is also a long-term commitment, because it can take seven to 10 years before your exterior paint needs to be refreshed again. So it’s important to take your time when choosing colors.

The key to selecting the perfect exterior paint color is to work with a professional. An experienced interior designer can help you narrow down your choices and find the right palette that complements your home’s style and architecture. This process is particularly important if you have unpainted stone or brick areas that will not be painted, because the colors used must coordinate with these fixed surfaces.

Another consideration is how a color will look at different times of the day and year. A paint color can look very different under natural sunlight and artificial light. It is also important to consider how a paint color will look with the surrounding landscaping and trees.

Choosing the wrong color can turn your beautiful home into an eyesore. Repainting your exterior takes a lot more time and money than painting an interior room, so it is important to be confident in your choice before committing to it.

Start by viewing small paint chips on color strips. Ideally, you should see the color swatches on a white surface that will remain present. This allows the undertones to show clearly so you can decide whether or not it is the right color for your home.

Next, drive around your neighborhood and pay attention to the color schemes of other homes in your area. Whether they are traditional, contemporary, or somewhere in between, you can learn a lot about what is popular and how to select the best colors for your own house.

Once you have narrowed down your options, visit a local paint store that offers samples in pint sizes. Purchase a few pints of the shades you like and apply them to your home, using contrasting swatches to see how they will look at varying times of the day and year.

Application

Choosing the right paint color for the exterior of your home can be an overwhelming task. Not to mention all the prep work and labor that goes into prepping surfaces and applying the paint. Hiring a professional to help with the process can save you time, money and stress in the long run. The key is to hire a pro that can match the quality of your own paint selections and follow proper painting techniques for a result you’ll love.

A good paint job protects your home from the elements and helps prevent deterioration. Investing in top-quality paint will ensure your new coat of paint lasts, especially when it comes to high-moisture areas. Choosing a flat finish will reduce glare from the sun, and it’s important to choose a paint that bonds well with your existing surface. There are a variety of paints available to suit a range of needs and environments.

When selecting your paint, look for a product that is formulated with advanced UV protection and weather-resistance. This will keep your color vibrant longer than other exterior paints, even with extended exposure to the sun. A great option for homeowners in high-moisture and high-rainfall areas is Behr’s Marquee Flat Exterior Paint and Primer. This product has received top marks from Consumer Reports and features a unique design that makes it self-priming in most cases. This means you’ll likely only need one coat instead of two, and it will eliminate the need for costly priming.

You’ll also want to select a paint that has a low level of VOCs (volatile organic compounds). These chemicals are harmful to your lungs and environment, but there are now many options on the market with very little VOC content.

A fresh coat of paint can breathe new life into your property and give it some much-needed personality. Before you choose a painter, make sure to meet them in person and take a close look at the state of the surfaces you’re wanting painted. Be sure to ask about the scope of the project, if any repairs are needed and if there’s anything that can be done to lower the cost. Set up an estimate appointment with a local independently owned and operated CertaPro Painters(r) franchised business to get the most accurate pricing for your specific job.

Final Inspection

The final inspection is a crucial step to ensure that all work has been completed and to identify any remaining issues. A number of things can go wrong during the building process that may not be obvious to untrained eyes, and can ultimately cause a project to fail its final inspection.

These issues can include improperly caulked windows, doors or other exterior elements. They can also include paint that isn’t properly applied or has drips or runs, which can lead to water intrusion or mold growth. In many cases, the painters are responsible for identifying these issues and addressing them as part of the contract.

During the final inspection, it’s also important to check that all agreed-upon repairs have been completed. It’s not uncommon for builders to skip this step when they are pressed for time as the date approaches for settlement, but it’s never a good idea. The purpose of the final inspection is to make sure that the home is in the same condition as it was when purchased and that all work has been completed as specified in the approved plans.

To do this, it’s important to have a final inspection checklist. This checklist should include all of the items that need to be addressed and the timeline for completing them. It’s also important to schedule the inspection for a time when the property will be unoccupied so that the inspector can examine it without interruption.

How to Apply Epoxy Flooring

Epoxy Flooring

If you’re in the market for a new flooring option for your home, you might want to consider epoxy. This flooring offers many benefits, such as easy cleaning, durability, and anti-slip characteristics. But before you can get started, you need to know more about how to apply it and what to expect.Epoxy Flooring

One of the most important things you need to do before installing Epoxy Flooring covering is to prepare the surface. Properly prepared surfaces will allow your epoxy coating to perform to its fullest potential.

The best way to do this is to take accurate measurements and test the surface for moisture before commencing the job. In addition to removing excess dust, you’ll also need to make sure the surface is ready to accept epoxy.

A quick check of the floor for any divots or chips can indicate whether the surface is ready to receive an epoxy coating. Before you begin, however, you’ll need to repair any cracks and other imperfections in the concrete.

A good quality epoxy coating should be applied to a clean and dry surface. To ensure a smooth finish, you’ll need to vacuum the floors first and then apply the coating. You can use a shop vacuum to do the job or hire a professional to do it for you.

Another important step is to remove all loose or damaged epoxy. You’ll need a wide roller for spreading out the new coating.

For the best results, you’ll need to apply the coat in small sections. Ideally, you’ll need to wait at least an hour before applying the coating to avoid bubbles. If you do apply the coat too quickly, the floor may become slippery.

There are many reasons why a floor may need multiple coats of epoxy. Some are fixing surface imperfections, while others are adding layers of protection. Whether you choose to add the top coat or not, you need to do it properly.

The most important thing to remember is that you must use the best quality epoxy available. In order to achieve the most durability, you should use a product that has a good abrasion rating. You don’t want to end up with a floor that peels or bubbles. The same applies to choosing a clear coat.

You will also need to use a primer. This is a product designed to seal out moisture and make the epoxy adhere better to the concrete. It can also increase the overall coverage of the epoxy.

After you have applied the primer, you can apply the first coat of epoxy. You can apply the epoxy using a squeegee or roller. You will need to wait about 12 hours for the epoxy to dry.

The second coat can be poured after the first coat has dried. You can sand the epoxy between coats to remove high spots and provide a tooth between the first and second layers. You can broadcast anti-skid additives such as pumice or colored quartz granules from 3M on the top coat while it is wet.

Lastly, you should allow the epoxy to cure for about 24 hours before you start using your car or truck on the floor. At this time, the previous coat can cure, and you will not need to worry about your garage flooring separating.

Emitted fumes from epoxy flooring can pose serious health risks. They can cause respiratory problems, including asthma and skin irritation. However, there are ways to mitigate the effects of these fumes.

The first thing to do is to understand what the symptoms of epoxy fumes are. The symptoms usually involve irritation of the nose, throat, and lungs. They can also cause allergic reactions, which can include itching, rashes, and red eyes.

A good way to avoid these symptoms is to use a portable fume extractor. These units use activated carbon filtration to capture hazardous epoxy fumes. Depending on the type of epoxy you are using, there are different types of filter media available.