How to Paint Your Home in Compliance with HOA

>

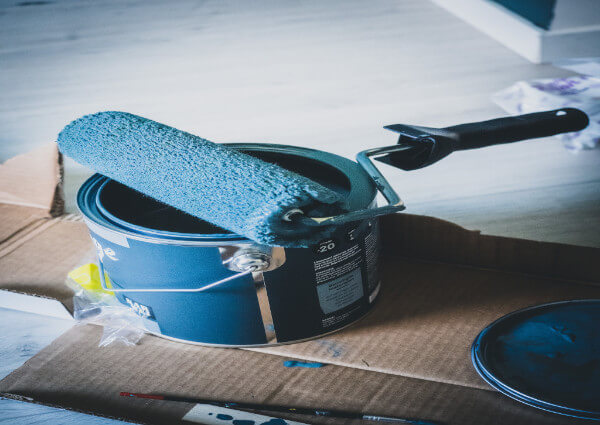
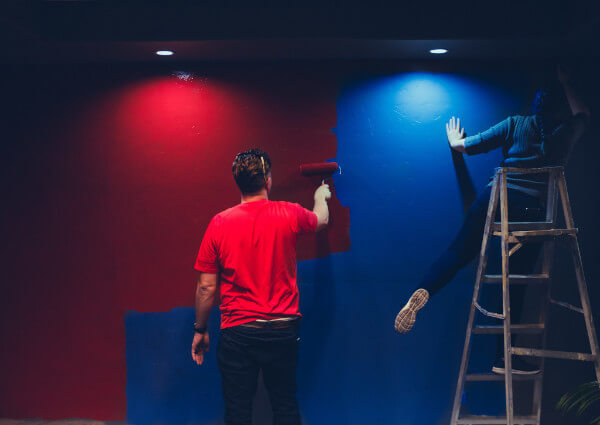
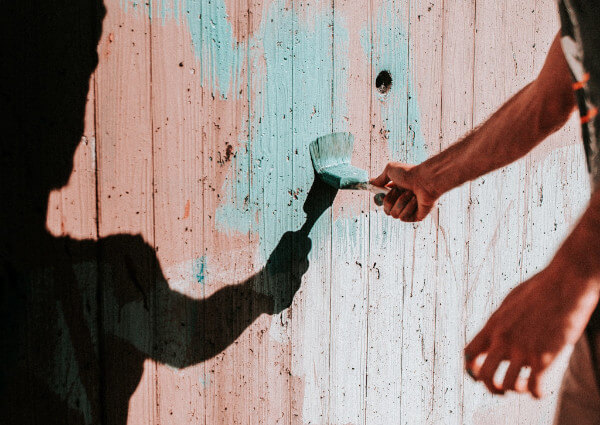
Are you tired of your home’s exterior paint? You may be interested in adding a fresh coat of paint to improve the look of your property. However, if you live in a neighborhood with a community homeowner’s association, you’ll have to get HOA board approval before starting your project. Unfortunately, getting the green light may not be as easy as you think. With that in mind, we’ve compiled a few tips on painting your home while remaining HOA compliant – just keep reading to learn more!

Why Is Compliance Important?

If you paint the exterior of your home without HOA compliance, they’ll be unhappy and issue you a fine. Some HOA’s may even take it a step further and pursue heftier fines if changes aren’t made after being approached the first time. The good news is you can easily avoid these problems by correctly appealing to the HOA. In most cases, you’ll have to fill out a form and supply the HOA with an exact color swatch matching the hue. Although it can take weeks before you get an official answer, it’s the only way to avoid a fine and unnecessary hassle.

Tips for HOA-Compliant Exterior Painting

Before you start an exterior painting project, you’ll want to make sure that you remain HOA compliant. Here are some tips to keep in mind:

Look Up the Restrictions

Find your HOA’s restrictions on home exterior paint colors. In most cases, they won’t allow you to paint your home any bright, loud, or unusual colors. That’s usually because they want to maintain a consistent look throughout the neighborhood. Before looking at color samples, make sure you know which ones are permitted so you can avoid choosing one that won’t be approved.

Look At Your Neighbors

Although general uniformity is desired, duplication is not. That said, many HOA’s won’t allow you to use the exact same color scheme as one of your neighbors. If that’s true of your HOA, take a look at the houses in your neighborhood and mark their color schemes off your list. You’ll want to avoid duplicating the exact colors of any house close to yours.

sk for Permission

Ask your HOA for permission to paint your home’s exterior. They’ll review your color choices and make sure they meet the HOA’s guidelines. If you’ve done your research and followed the tips listed in this post, you should have no trouble getting their approval!

The HOA’s job is to make sure your neighborhood looks nice, which means your paint job needs to be well-done. The best way to ensure quality results is to hire a professional painting crew – they’ll make sure you have a crisp, clean paint job that the HOA will have no reason to complain about!

About Platinum Painting

At Platinum Painting, we are committed to the satisfaction of every homeowner, which is why our home painting projects are always successful. Our highly skilled and qualified team will always go the extra step to ensure your paint job is done well and in compliance with the HOA. To learn more about our services, visit our website or call us.

The post How to Paint Your Home in Compliance with HOA appeared first on Platinum Painting Blog.

Did you miss our previous article…
https://www.dilconpainter.com/?p=278

Here’s How to Repair Wall Damage for a Smooth, Paintable Surface

You can’t get a great paint job without a smooth surface. That’s why prepping is so important – it gives you the chance to repair wall damage, including cracks and holes, before you roll on that first coat of paint. Here are the wall-repair tips you need to know to help you get the most out of your paint job.

Repairing Wall Damage, Big and Small

Unless you’ve patched big holes in drywall before, we recommend leaving anything bigger than the size of a hammer head to the pros. With that caveat out of the way, here are our tips for repairing wall damage, big(gish) and small.

Dents and Dings

Damage like small holes and divots is the easiest to repair. You’ll need:

Fast-drying spacklingSandpaper or drywall sanding spongeDrywall knife

Clear away any debris from the imperfection. Smooth on fast-drying spackling with your putty knife. Wait 24 hours and then sand*.

Popped Nail Heads

Have you noticed circular bulges (or even visible nail heads) in your drywall? Those are nail pops, and they happen when drywall shifts and works a nail loose. These are purely cosmetic and simple to repair. You’ll need:

HammerScrewdriver or drillWall screws (sized to penetrate the stud by at least three quarters of an inch to insure they don’t come out)Joint compoundDrywall knifeSandpaper or drywall sanding sponge

Screw one screw into the stud about an inch above the nail and one about an inch below. Then, you can either hammer the nail back in or remove it. Wall screws are made to sink below the wall level, so you can cover them with joint compound (do the same for nail or nail hole). Wait 24 hours and sand*. If you can still see the wall damage, reapply the compound, wait 24 hours and sand* again.

Small Holes

Small holes (up to two inches) can be repaired with a patch kit. You’ll need:

Mesh patch kitDrywall knifeSpackling compound or joint compoundSandpaper or drywall sanding sponge

Follow the instructions on the kit for sticking the mesh patch over the hole. Use the drywall knife to apply the compound smoothly. Wait 24 hours and sand*.

Repaint

Once the wall is prepped, you’re ready to paint. If you’re repainting the whole room, note that high-gloss paints and certain textures and faux finishes can emphasize wall damage. So, when choosing your wall finish, steer toward matte, eggshell or satin for the smoothest finish.

If you want to paint high-gloss paint over a repaired wall (or add texture), prime the wall first. This will help conceal any wall repairs and will help the wall finish stick better and cover more smoothly.

Our paint pros always wall prep before they paint. Learn about our interior painting services or get free 8″ x 8″ paint swatches from our color consultants today.

*WARNING! If you scrape, sand or remove old paint, you may release lead dust. LEAD IS TOXIC. Contact the National Lead Information Hotline at 1-800-424-LEAD, or log on to www.epa.gov/lead

The post Here’s How to Repair Wall Damage for a Smooth, Paintable Surface appeared first on Paintzen.

Did you miss our previous article…
https://www.dilconpainter.com/?p=274

What Are the Five Types of Paint Finishes and Why Are They Important?

Choosing a paint color is the first thing most people think of when they think of painting. But did you know the paint finish is just as important – maybe more so – than the color? Here are the five finishes and why it’s important to pick the right one.

What’s a Paint Finish?

Before we jump into the finishes, themselves, let’s talk about what a finish is. A finish is the paint’s texture after it dries, and how much light it reflects off the wall. These can both impact the way you perceive the color (and can accentuate or hide imperfections in the finish).

The Five Paint Finishes

If you’re in the process choosing a paint finish, knowing the full menu of options can help. Here are the five paint finishes:

Flat (or Matte)EggshellSatinSemiglossGloss

Flat paint gives your walls a uniformly smooth appearance. This paint finish is perfect for areas where you want to minimize reflection of the paint’s surface, like living rooms and dining rooms. Flat paint helps mask any less-than-smooth areas in the walls, like nail holes, patches or nail pops. It’s also a natural for ceilings. Low-sheen paints require fewer coats than higher-sheen paints, because there’s less contrast between the touch-up and the rest of the paint job.

Eggshell is a great option for almost any room because it has a soft look of an eggshell. While the finish is low gloss, it’s more reflective than flat paint. Because of its slightly higher sheen, it’s also easier to clean and more durable than flat.

Satin finishes are the most commonly used finish. They reflect more light than eggshell and flat and are good for high-traffic areas like halls and kids’ rooms. They’re even easier to clean than their less shiny counterparts.

Semigloss is more reflective than satin, giving rooms a slightly shiny look. This can make darker rooms brighter, especially when used in light tones like white, cream and other neutrals. While the glossy surface shows more imperfections, it’s good for high-humidity rooms like bathrooms because it resists moisture. Easy to clean, semigloss makes a good option for trim and doors.

Gloss finish is the diva of the group with the highest level of reflectivity. Most commonly used on cabinets, molding and doors, gloss requires more coats than its more matte cousins, but it also cleans up easiest.

Where To Use Each Finish

Flat paint is best used in living rooms, dining rooms, bedrooms or offices – any place you want minimal light reflected in the room.Eggshell can be used in any room in the house, though because it’s more susceptible to humidity, steer clear of eggshell in kitchens and bathrooms.Satin is the most commonly used finish and can be used in any room.Semigloss is great in high-humidity areas like kitchens and baths. It also works on doors and trim.Gloss is used primarily on doors and trim, but some designers use it to achieve a high impact, mirrorlike appearance on walls.

Have more questions about paint finishes? Contact our color consultants. Did you know we’ll mail you free 8″ x 8″ paint samples? Learn more

The post What Are the Five Types of Paint Finishes and Why Are They Important? appeared first on Paintzen.

A Simple Guide to Picking the Right Interior Gloss

>

Painting your home can be an overwhelming task. With so many colors and finishes to choose from, deciding on the right one can be headache-inducing. Since each paint sheen has its own practical and decorative job, selecting the best one for each room in your home will require some thought. Luckily, we’ve created a handy dandy guide to help you find the perfect interior paint gloss – after you select a color, of course. Continue reading as we discuss the different types of paint gloss and share tips to help you choose the right one.

Types of Paint Gloss

Paints come in a number of sheens, or “gloss levels”. It determines how reflective the dried paint surface will be. Let’s take a closer look at a few common paint sheen options.

High Gloss

Since high-gloss paint is hard, ultra-shiny, and light-reflecting, it’s the most durable and easiest to clean. This type of paint gloss is an excellent choice for high-touch areas, like cabinets, trim, and doors. However, because they’re extremely shiny, they will show far more textures and imperfections on a painted surface – so don’t skimp on prep work.

Semi-Gloss

Semi-gloss paints are fairly reflective of light sources. They’re a good option for walls that encounter moisture, drips, and grease stains. Like high gloss, this type of paint is quite easy to clean and maintain!

Satin

This type of gloss is often described to have a velvety appearance. Satin paint is another excellent choice for high-traffic areas because it’s easy to clean. The only downsides are that it’s less resistant to staining than glossier paints and can be a bit tricky to apply.

Low-Sheen

Low-sheen paints have an essentially flat finish with little luster. It works well at covering wall imperfections, making it a great option for spaces that don’t get a lot of bumps and scuffs.

Flat or Matte

This type of paint gloss soaks up light rather than reflects it. All light sources that hit flat or matte paints will diffuse, creating an even, soft-looking surface. Because it has the most pigment and provides the most coverage, it’s an excellent choice for people wanting to save time and money. However, it can be difficult to clean without taking paint off with the grime.

How to Choose Your Paint Gloss

When choosing your paint gloss, here are a few factors you should take into consideration:

Aesthetic – Alongside its sheen, you’ll want to consider how your paint color will look. To get a real feel for the sheen and color after the paint dries, get sample paints and apply them onto your surface.Use – The utility of a room may also affect your decision. For example, you’ll probably want to use high-gloss paint for walls that will require more cleaning (i.e., kitchen, bathroom, doors).Light – Consider the light sources of your room and opt for a paint that works well with the lighting.

Hopefully, this guide has given you a better understanding of the different types of paint gloss and when to use them. Now you can make the right decision for your home and bring your vision to life!

About Platinum Painting

At Platinum Painting, we take pride in our ability to give customers the exceptional service they deserve. Our team of highly experienced and knowledgeable professionals is more than capable of giving you the stunning results you desire. If you’re interested in scheduling your free estimate, contact our team via our website or give us a call!

The post A Simple Guide to Picking the Right Interior Gloss appeared first on Platinum Painting Blog.

PPG Paints 2022 Color of the Year Combines Sanctuary With Sophistication

Introducing the PPG Paints 2022 Color of the Year: Olive Sprig. This relaxed, enticing green emulates the feeling of soothing aloe vera or a fragrant plant. It brightens any space with organic liveliness. A versatile color that lives well inside or outside, Olive Sprig blends in with nearly any environment.

Olive Sprig, the 2022 Color of the Year, can turn a room into a sanctuary. Pair it with brass accents and wood tones for a sophisticated look you’ll love.

Get a Natural Feel

Sanctuary with Sophistication

Elegant, grounded and versatile, this highly adaptable gray green represents growth and resilience.

Global Color Trends Forecast

As part of the choosing the 2022 Color of the Year, the PPG Paints team also creates a Global forecast. This forecast provides direction and inspiration to architects, designers and homeowners across the hotel, retail and residential markets. PPG customers in all business sectors also rely on the forecast for new products and color specifications.

Watch the Global Forecast Video

See All Three of Our 2022 Paint Color Palettes

We brought our 2022 colors to life through three trend stories, each nestled within the overarching theme of Horizon. Here are the three palettes:

Introspective — This color story is for those who prioritize self-care and appreciate life’s simple pleasures. These serene hues impart a warm, lived-in quality, giving any home a sense of simplicity and peace.

Inspired — Are you looking for a mood-boosting shade that’s sure to turn up the volume in any space? This Inspired palette will add an optimistic jolt of energy to your home. It’s perfect for anywhere you want a fresh pop of color, from a front door to a playroom.

Invaluable — Grounded in tradition, Invaluable uses refined darks to create glamorous, artistic interiors. Draw inspiration from the past and pull from a rich library of cultural references for a look of depth and warmth.

Go Introspective

Simplicity and Peace

Add a hint of color to an otherwise neutral-toned kitchen. Or, create an ethereal bedroom retreat with this soulful color palette.

Serene Spaces

Pair these calming, restorative colors with off-whites and neutrals for a warm, lived-in quality.

Get Inspired

Energize

Energize your home with these vibrant, joyful hues. (Hey, isn’t that the 2022 Color of the Year on the walls?)

Motivate

Turn heads with a blue so vibrant it motivates everyone who sees it.

Feel Invaluable

Rich Hues

Draw inspiration from the past to create the palette of the present.

Depth and Warmth

Pair these rich, dark hues with brass and natural wood to turn up the drama.

If you love color as much as we do, you’ll love learning more about the 2022 Color of the Year from PPG Paints.

Want to bring the latest colors into your home? Let our color consultants help you find the hues that are right for you.

The post PPG Paints 2022 Color of the Year Combines Sanctuary With Sophistication appeared first on Paintzen.

Did you miss our previous article…
https://www.dilconpainter.com/?p=246

5 Ways to Make Small Rooms Look Bigger

>

Painting a home can do a lot more to it than give it a face lift. Today, many young homeowners are working with smaller budgets, so they can’t invest in renovations like removing walls and heightening ceilings to make rooms look bigger. One cost-effective way to make rooms feel and appear larger than they actually are is to paint the walls. Read on to learn how you can use paint and décor to take a room from feeling cramped to looking expansive.

Utilize Paint

Something as simple as painting the room a lighter color can make it appear brighter and larger. It’s a good idea to avoid a pure white color, because it can create dramatic shadows with the furniture and décor that actually makes the area look smaller instead of larger. Instead, try light and pale blues, greens, purples, tans, and grays. These are all airy, modern-feeling colors that can go with a wide array of room themes and furniture.

Incorporate Mirrors

Mirrors are a more obvious technique to take a small room and make it appear larger. That’s why you see many apartments with built-in mirrors along the length of walls. While this specific way of utilizing mirrors may be a little overwhelming, a more reasonable way to utilize this method of expansion would be to place large mirrors in areas of the house that don’t receive much light. This will keep the light bouncing around the room, making it look as though it’s more spacious than it actually is.

Invest in Houseplants

Houseplants won’t just make your home feel happier and boost your mood, they’ll also make a space appear more open and airy. If you’re confident in your ability to keep them alive, try investing in some great plants to hang from the ceiling or display on bookshelves. Some excellent, easy-to-care-for houseplants include pothos, succulents, ivy, and snake plants!

Stage the Room with Lighting

A dark space appears cramped, so installing some much-needed lighting to illuminate corners of rooms can help it appear bigger. You can try utilizing lamps, track lighting along ceilings, or just getting around to replacing that lightbulb that went out on the ceiling fan in a room months ago!

Marie Kondo the Room

Finally, the most dreaded way to make a room appear larger is cutting the clutter. Explore your room and open up boxes that have been taking up space in your living room, hallways or closets, and in the famous words of Marie Kondo, ask yourself if what you pull out “brings you joy.” If not, it might be time to donate it!

You don’t always have to put your money into a costly home remodeling project to make it appear larger than it does now. Sometimes, all it takes is a little ingenuity and a small budget!

About the Author

Our team at Platinum Painting has been helping homeowners transform their spaces for years, and we’re sure to never cut corners. We always take the time to understand each of our clients’ visions, so we can achieve the best possible results. This dedication is reinforced by our satisfaction guarantee. If you would like to learn how to expand your living space with a simple coat of paint, we welcome you to visit our website or call 817-380-4404 to schedule a free in-home estimate today!

The post 5 Ways to Make Small Rooms Look Bigger appeared first on Platinum Painting Blog.

More Than Color: 5 Paint Finishes and When to Use Them

>

After looking at the walls of color swatches and trying out a few options on your wall, you’ve found the perfect paint color for your living room. You’re all set to get painting, right? Wait! You still have an important decision ahead of you—picking the finish. But how does the finish really affect the quality of the paint job? Read on to find out about the different finishes you can choose and in what situations you might want to use them.

High-Gloss

This is the glossiest option available. This finish is significantly shiny, so it is most suitable for door frames, window sills and other similar accents. High-gloss paints also work best in rooms where messes are likely to happen because they are easy to scrub and clean. Kitchens and bathrooms, namely, are rooms where you may want to consider getting a high-gloss finish, especially if you have young kids. Just keep in mind that because of its shininess, imperfections in the wall are more visible than with other finishes.

Semi-Gloss

Not quite as shiny as high-gloss, semi-gloss still reflects plenty of light, making a space look brighter and more airy. It’s predominantly used for trim and other accents but also comes in handy for bathrooms, kitchens, and kids rooms too. This gloss makes cleaning a breeze as well!

Satin

Satin is the perfect middle ground between high-gloss and flat finishes. It reflects some light but also hides flaws much better than semi-gloss or high-gloss paints. Depending on the texture quality of your walls, this could be a good option for a bedroom, living room, or dining room. This finish is still easier to keep clean than less glossy options, making it a good compromise.

Eggshell

Don’t expect many messes in a specific room? Do you have flaws in the walls that you’d like to go unnoticed? Eggshell finish may be the right fit for the room. Although not as easy to clean as other glosses, this finish makes the walls look smooth. In guest bedrooms, especially if you aren’t anticipating much activity in the room or little impact on the walls, this finish is a good option.

Flat

Compared to the rest of the finishes, flat hides imperfections the best, but it is also more difficult to keep clean. This finish often works best in guest bedrooms or living rooms.

In the end, it’s important to take the finish into consideration. The gloss can impact how well your walls weather the normal daily wear and tear or appear in the light, so you need to choose carefully. Understanding more about the various glosses can help you make the right decision in your home improvement projects and create the look you want in your rooms.

About Platinum Painting

Since 2008, Platinum Painting has helped more than 10,000 homeowners achieve their design goals for their homes. While most residential painting companies give vague quotes over the phone, we come directly to you and provide you with a written estimate that you can rely on. Interested in scheduling your free estimate? Reach out to our customer care team today!

The post More Than Color: 5 Paint Finishes and When to Use Them appeared first on Platinum Painting Blog.

3 Things You Should Do Before the Painting Crew Comes

>

After spending so much time at home over the past year and a half, you’ve decided that your house’s exterior could use a new coat of paint. You don’t want to take this Herculean project on yourself, so you hire a residential painting company to do it for you.

But then when you schedule the team to come and paint, they give you a list of things you need to do to get ready. Aren’t you hiring them to do everything for you? Do you really need to follow these instructions for prepping your house to paint? Here are the steps you as a homeowner should take before the crew arrives and why it’s important to do them.

Turn Off Sprinklers

If you have a set timer for your sprinkler system, make sure it is turned off by the time the painting crew has come to start exterior painting. They likely don’t want to get soaking wet, and you certainly don’t want streaks or drips in the final paint finish.

Clear the Space

Do you have flower pots or ornaments hung outside your home? Do you have toys, patio furniture, or a grill that’s located near the house? These things need to be removed from the workspace in order for the painting team to get to work right away. Otherwise, they have to spend that time—on your dime—doing it for you. Plus, even though the team will try to be careful, there’s no guarantee that your possessions will be undamaged.

Keep Animals Contained

Your dog or other pet may want to say hello to the painting crew, but animals can get in the way. You need to secure your pets in another area or inside the house so that the team doesn’t have to worry about your pet accidentally escaping or distracting from their work. Also, it’s important to make sure any messes your pet may have left in the work area have been cleared so that the painters don’t step in them.

Why You Need to Prepare the Outside for Painting

Perhaps you’re thinking to yourself that you don’t want to do any work before the painting crew comes. However, that could be a costly mistake. Not doing these simple steps beforehand can make the process much more complicated and cause the project to take longer than expected, which means you pay more. Or you could end up with results that don’t look as flawless as they could.

Getting your house ready for exterior painting doesn’t take a ton of time. By doing this prep work, you can save money in the long run and make sure that the outside of your house is as beautiful as you imagined.

About Platinum Painting

Since 2008, Platinum Painting has made homeowners’ design dreams a reality. While we handle steps like power washing the exteriors, sealing up cracks, and cleaning up afterward, the Platinum Painting team asks homeowners to take these preparatory steps to make the most efficient use of time. We also are happy to provide in-person estimates, which are far more accurate than over-the-phone quotes you get with other companies. You can learn more about the Platinum Painting difference by contacting our Customer Care team!

The post 3 Things You Should Do Before the Painting Crew Comes appeared first on Platinum Painting Blog.

Did you miss our previous article…
https://www.dilconpainter.com/?p=207

Steps to Paint Brick the Right Way

>

You’ve decided to take the plunge—you’re painting the brick on the outside of your house. The earthy tones used to be in style at one point, but now you want your house to stand out and really make a statement. Good choice! But painting brick isn’t quite like painting other surfaces. If you want the finished product to look amazing, you need to approach it differently. Here are the steps to doing the job the right way and mistakes to avoid in the process.

Why You Should Get Help

When it comes to DIY projects, painting may initially seem simple enough. However, flaws in the exterior painting can be apparent to anyone who walks or drives by your house or comes to visit. Getting the brick right is important if you want to make a good impression. Turn to Platinum Painting to handle the stress of this project. As professionals, we know how to paint brick, and we have years of experience doing it correctly.

Step #1: Power Wash

Unless the house is brand-new, chances are that your exterior brick could use a thorough cleaning. Years of dirt and grime need to come off before you paint, or it won’t adhere properly to the brick. Use a power washer to flush out all the nooks and crannies. Although you could in theory get a brush and scrub the bricks with a cleaning mixture, this method would require hours of hard effort, especially if you have a large house.

Step #2: Fill and Caulk

Before you paint, you need to take a closer look at the brick and grout. Are there any cracks, holes, or leaks? These weakened areas can allow moisture to seep through and damage the interior of your house. Now is the time to caulk them and seal off these access points, protecting your home from moisture. Give the acrylic caulk plenty of time to set before moving on to the next phase.

Step #3: Prime and Paint

Did you know there is a special primer specifically for masonry? Brick is unique in that it is especially porous and rough. As a result, it needs to be primed prior to opening the first paint can. Whether you choose to use a sprayer or a brush to apply paint to brick, you must make sure to paint from all angles. Otherwise, even coverage can be difficult to achieve, and you’re more likely to end up with mistakes or flaws in the paint job.

Ultimately, on your own painting your exterior brick can feel overwhelming, but when you have a team who has completed the process countless times, you can simply look forward to the final result with less stress and more excitement!

About Platinum Painting

With a background in home design and customer service, Platinum Painting owners Karl and Marjorie Pickens started the company in 2008. Although the team has grown since then, many of our employees have been with us since the beginning. As a result, we know which materials are best for each job and how to approach each project. Would you like to have a free in-person estimate? Contact Platinum Painting and talk to our Customer Care team today!

The post Steps to Paint Brick the Right Way appeared first on Platinum Painting Blog.

Hot Color Trends in Exterior Painting for 2021

>

After spending so much time at home over the last year and half, you’ve decided to repaint your exteriors now that gatherings are becoming normal again. But which color(s) should you choose? When you go into the paint store, you’re instantly surrounded with nearly limitless options, and it can quickly become overwhelming. We’re here to help you make the right choice for exterior painting! Read on to learn what colors are in style right now to guide you in your selection.

Light Neutrals for Walls

If you’re considering painting your home’s exteriors, lighter colors are a safe bet. Here are just a few of the most popular shades to think about.

Warm, Creamy White

Although you don’t want to paint your outside walls with a true white, a warm, creamy white color is the perfect choice for brightening up your home and making it stand out in the best possible way.

Pale Gray

Although gray decreased in popularity in 2020, pale gray is a great alternative to beige and can add variety to your street’s aesthetics.

Beige

Believe it or not, beige is still a great choice for painting your home. However, you should choose a  shade of beige that doesn’t run the risk of turning yellow.

Pale Green and Blue Accents

Paired with one of the light neutral wall colors, pale shades of green or blue are calming yet still visually interesting.

Black Accents

On the opposite end of the spectrum, black is also in style for accents. It’s a great choice if you want something bold!

Two Tones

Depending on the style of your home, you may want to have two main colors. For instance, ranch-style homes look great with complimentary shades.

Wood Trim

Don’t be afraid to add some contrast to the exteriors, even if that contrast is a different texture altogether. Wood, as well as other earthy paint colors, are definitely worth considering.

Knowing the current trends is certainly helpful, but you still have many options available to you. At this point, you may be wondering how you’re ever going to make such an important decision. After all, your home’s exterior is the first thing you and your guests see. Needless to say, the first impression matters. That’s why Platinum Painting offers a free in-person color consultation to help you determine which colors would best suit your home. Regardless of what color choices you make for your home’s exterior, when you work with Platinum Painting, you’re sure to love the results because we’re not happy until you are!

About Platinum Painting

Since opening for business in 2008, Platinum Painting has grown to serve homeowners throughout North Texas. Many of the staff have decades of industry experience and know all the latest design trends. In addition to an at-home color consultation, the initial estimate is carried out in person as well. This enables us to provide accurate quotes and advice and allows you to ask any questions you may have. To schedule your free estimate, just contact Platinum Painting!

The post Hot Color Trends in Exterior Painting for 2021 appeared first on Platinum Painting Blog.